A chronicle of Mike and Julia's adventures creating a home on the Missouri range...

Wednesday, March 12, 2014

Permaculture

     While we have a few more months away from our Missouri homestead--where surely there will be more action and adventure to chronicle this coming season--I thought I would do a series of posts about some of the guiding principles behind the life we are creating there.

     The first of these is a term that you may or may not have heard before, permaculture. This term didn't exist before 1978 when a couple of Aussies, David Holmgren and Bill Mollison, decided to bring together a bunch of design principles and farming practices and turn them into a teachable philosophy of sustainable farming and living--hence, "permanent-agriculture" or more recently "permanent-culture"... permaculture! As Bill Mollison defines it, "permaculture is a philosophy of working with, rather than against nature; of protracted and thoughtful observation rather than protracted and thoughtless labor; and of looking at plants and animals in all their functions, rather than treating any area as a single product system." Basically, how humans had been living in relation to their ecosystems (and still do in many parts of the world today) up until the Industrial Revolution!


      Currently, standard Western farming practice is to isolate one desired output (corn, soy, cattle, pigs, tomatoes, whatever) and treat the land that it is produced on as if it were a factory designed to pump out that single product. Those single products have a name, "monocrops," because they are the only thing grown on a piece of land year after year. This form of agriculture requires enormous inputs in the form of chemical fertilizers, pesticides, and irrigation to grow because the soil simply cannot sustain such huge demands year after year with no replenishing return. Where in nature do you ever see one species growing alone without hundreds of other species coexisting with it? Insects, diseases, small mammals and birds all move in to play their part when they see a huge field of a single species growing in isolation, hence why monocrop agriculture is so pesticide/fungicide intensive. Industrial agriculture has gone to great lengths to engineer its way out of the simple fact that the land is not meant to be a factory with industrial design principles applied to it. Super weeds, new blights, resilient insects and diseases evolve to out-compete the chemicals; not to mention there are huge consequences we are only just beginning to realize to poisoning water and ripping up top soil (a precious and dwindling resource that took thousands of years to build up, now washing out of the heartland into the Gulf of Mexico at a rate of one billion dump truck loads per year! Ack!) There has to be a better way to feed ourselves, and there is! It involves small, diverse systems designed to work with nature, providing both yields for us humans and returns that nourish the land for the long haul.

This map shows all the watersheds that feed into the Mississippi River.  Imagine all the top soil getting washed down stream each year because of poor farming practices!


      Permaculture is taught in books and certification courses in more detail, but the basic twelve principles (plus a few more) and examples of how we are using them at our homestead are easy to outline here:

1. Observe and interact- The first step when creating a land design is to observe what is already happening on the land. How is water moving across the landscape? What is the trajectory of the sun? Where are the best and worst soils? Where is the most biodiversity? We did a lot of this when we first came on the land, testing soils, watching during storms to see how rain was moving, marking out our flood zone, and just generally scouting about learning trees and plants. It can be hard to be patient enough to take the time to do it all when you want to get started planning, but well worth it.

2. Catch and store energy- The idea here is to collect and store resources when they are abundant. For us, this meant digging a pond that would fill with water during the winter and spring so we can use it during the dry summer months. It has also meant stopping work to cut up firewood when we had trees come down, collecting free produce from the university garden when they had excess to give away and then spending a few days canning it, and so on.

(this is not our garden... we only wish it were)

3. Obtain a yield- Make sure you are getting something useful (like food) for the work you are putting in. This is a pretty obvious objective, but think about how much effort people put into mowing grass, or exercising at the gym, without getting a useful yield from it! What if we could turn lawns into gardens full of beautiful edible plants and spend the same amount of work tending them instead?

4. Apply self-regulation and accept feedback- Human activity happens quickly and can be quite destructive so it is up to us to think about the consequences before we cause them. Nature's feedback loop can take much longer but it is usually there letting us know when our designs are not working (for example, the Irish potato famine let farmers know that growing a monocrop of potatoes was not a good design, it wasn't diverse enough to be resilient to blight).

A sun oven at work... free heat for the catching! 


5.  Favor biological resources- rather than consuming non-renewable resources! For example, we have been switching over to drying clothes on a line rather than an electric dryer, because we obtain the same result for less cost to ourselves and the environment. We also cook our food using sticks via our rocket stove and the sun (with a sun oven), instead of using propane. And so on. There is more than enough energy to go around if we use it appropriately.


A Living Machine treating waste water-- each tank has different types of plants and organisms in them that slowly filter the water as it flows from one to the next to the next. 


6. Produce no waste- This is an interesting design principle. One of my favorite illustrations of it is the industrial design work of William McDonough, who helps factories redesign so that their effluent waste streams can get cleaned via bioremediation systems (like Living Machines) and cycled right back into the factory to be used as a resource! On the scale of a homestead, it means thinking about how to turn what is considered waste into an asset. For example, when we had a bunch of rotten logs get pushed into a pile from our pond being dug, we decided to turn them into hugelkultur swales which will nourish young trees as they break down.

7. Design from pattens to details- One of the patterns most often referred to in permaculture are zones based on frequency of use--from zone 1, your house site and everyday use areas surrounding it, to zone 5, a wilderness area with limited human intervention. High maintenance plants get positioned closer to zone 1 where they will be seen and tended to every day, whereas long term firewood and timber species can get planted further away in zone 4 where they get visited once in a long while. Once these patterns are established we can work out the details of what to plant where.


8. Functional interconnection- By putting elements in proximity to each other, they can mutually benefit one another. For example, we planted several native fruiting trees (mulberry, plum, chokecherry, blackhaw) next to the area we plan to have a chicken pen in the hopes that the trees can help feed, shade and protect the chickens from air-born predators, while the chicken manure will help nourish the trees.

9. Use small and slow solutions- The idea being, the means will tend to be more local, sustainable and easier to maintain on an individual scale. Sometimes it feels like everything we are creating is too small and too slow. I guess a good example of this is that I wish we had forty cultivar fruit trees planted, like, two years ago, but our soil needed some building first. We would probably have forty dead saplings on our hands if we had planted them all at once our first year. So we started building soil with hugelkultur swales (which slow and catch rainwater run off) and a moveable outhouse that is slowly leaving "fertility deposits" around our orchard site. Next year we will be able to plant the first few trees and be able to tend and water them well because we are starting small. The next year we can plant another four. And so on. In the long run, going slow and not biting off too much at once will yield us a much healthier and abundant orchard.

10. Use and value diversity and redundancy- Diversity reduces vulnerability. Both in terms of crop species and systems that we humans rely on for our needs. We are trying to think in terms or redundancy with our water systems--if we collect rainwater off of several roofs and also have the pond water as a back-up, we are less likely to run into a water shortage during a drought. If we plant fifteen types of fruit trees instead of just one variety, the chances of a blight like Cedar-Apple rust wiping out all of them is much less likely.

11. Use edges and value the marginal- The most biodiverse areas of any ecosystem are its edges, from pond edges to forest/field edges, to the edge between ocean and land. One of our regrets in designing our pond was that we didn't ask the excavator to dig the edges of the pond in a more wavy, irregular pattern with different depth levels. It happened so quickly we ended up with basically a big oval, but already we can see that the edge is where all the life is thriving: reeds and minnows and birds and woodland mammals on the prowl are all attracted to the edge, I just wish there were more of it!

The edge is where it's at...


12. Creatively use and respond to change- We can have a positive impact on inevitable change by carefully observing and intervening at the right time. Hmm, pretty self explanatory but increasingly important with the effects of climate-change on the way.


13. Stack functions- This is a permaculture principle that pops into my mind quite frequently. It is not on the original list of 12, but both Mike and I both learned it in our respective Permaculture Design Cert. courses. The idea is that every action or placement or design element can and should serve more than one function. For example, we have some south-facing sloping areas that we are hoping to terrace with stone retaining walls. And then we got to thinking... wouldn't it be great to plant mediterranean herbs coming out of the stones that like the retained heat? And couldn't we also plant some things in front of the walls that need a slightly more wind-sheltered, warm climate, like apricots and figs? Thus the wall will be performing many functions, all stacked in the same space.

14. Use and accelerate succession- Succession is the process that is happening all the time in nature: field is slowly becoming young forest, young forest becoming mature forest, and so on. When we work with that process, steering it to our advantage, we fight nature less, and yield more benefit. Mike and I are trying to do this by planting lots of native trees that will yield us benefit (fruit, nut, firewood) on the edges of fields and forest, areas where succession is already beginning to take place. Hopefully the hardy edible natives will outcompete the sapling oaks coming up and yield us something in, oh, about 20 years! In the meantime, we have been cutting down young oaks for use in building and fencing, the perfect size for small diameter poles. Thank you succession.

       So there is some Permaculture food for thought! If you are interested in learning more about Permaculture there is really no shortage of amazing courses, teachers and designers, and resources in the form of websites, films, magazines, and books. And if you are not such a DIYer, you can hire a permaculture designer to develop a landscape design with you; whether you have a small yard or huge acreage. Here are a few of our favorite permaculture resources out there:


Introduction to Permaculture, by Bill Mollison, Tagari Press.
This book is a good starting place to get an introduction without being overwhelmed. It is written by the illustrious Bill Mollison himself, co-founder of Permaculture. He breaks down the basics of permaculture for the initiate reader, covering the basic design topics of house placement, energy systems, animals, orchards, gardens, and microclimates.
Permaculture: A Designer's Manual, by Bill Mollison, Tagari Press.
This is a massive textbook, not for the casual reader. I have tried to read it cover to cover multiple times and failed because of the shear dry density of the information therein. But there are loads of wonderful detailed illustrations  that compliment the text and make it more skim-reading friendly. I would recommend investing in this not-exactly-cheap book if you are seriously considering taking a course or embarking on a permaculture design of your own! Of if you are a geek who likes textbook reading.


The Resilient Farm and Homestead, by Ben Falk
This is one of my new favorite books, just out last year. Ben Falk is a practicing Perm. designer in Vermont, and over the last decade has been turning a piece of land into a Permaculture teaching center, slowly experimenting and implementing many of his ideas. In the book he chronicles and illustrates his own designs on his land (10 acres), as well as his list of 72 principles, plus design process advice, as well as chapters on all of the major components of a homestead-- water and earthworks, fertility harvesting, food crops, fuel and shelter--all within the lens of designing resiliently, with changing climate and society in mind. Several friends also agree, one of the best North American permaculture books out there. And beautiful to boot.

 Toolbox for Sustainable City Living, by Scott Kellogg and Stacy Pettigrew
Here is one for all you DIY city-dwellers out there, trying to take some modicum of control back over the compact environments around you! The authors scale down all the big permaculture ideas to very accessible, city-yard scaled DIY projects. Topics include food production, small-scale animal husbandry, water security, waste management, autonomous energy, and bioremediation of toxic soils.


Edible Forest Gardens, by Dave Jacke
This two volume set is the best literature out there on designing, planting and managing a forest garden. "Guilds" of different plants, vines, shrubs, and trees species can all thrive when planted together, and these books will teach you how and what to plant. Exhaustive species lists and dense tree-geek info, beautiful detailed illustrations and hefty price tags... but still, what a great resource!
Permaculture magazine
This is a good quarterly publication based out of the UK, with articles on all aspects of permaculture and self-reliant living. A few of my friends have had articles published in this journal, and I like that it has articles by permaculture enthusiasts of all sorts, who are independently experimenting and inventing new ideas and systems, and then sharing them back with the community in bite-sized articles.


Websites:
www.permies.com - Apparently the largest Perm. website out there (how does this get measured?), but definitely the most popular on this computer! (Mike visits frequently.) The website consists of many threads of conversation, divided by topic, which you can read through or add your own question/idea/comment onto. Lots of great videos and podcasts as well. There is really just a ton of useful information on this website, but it does take some sifting. A good place to kill some time.

Videos:
Farming with Nature- Permaculture with Sepp Holzer (www.youtube.com/watch?v=Bw7mQZHfFVE) - This guy is amazing and just totally inspiring. He basically turned the high-altitude slope of his Austrian mountain farm, Krameteroff, into an abundant, biodiverse oasis using just simple permaculture principles. There is a longer video about it, but a short taste on youtube here!

Thursday, February 13, 2014

Questions... answered!

      We are back in the city. Philadelphia, city of brotherly love, and electricity, and wifi, and hot water on tap, and a pizza place down the street. It is definitely a different world than our life in Missouri, and as we have transitioned back into these changes, there is a part of my mind that has stayed aware of all the privileges and conveniences built into this life that I grew up taking for granted. Heating up water on a gas stove, hitting a switch to get instant light, twisting on the hot water to take a nice hot shower... what luxury! And how quickly I begin to take it for granted!
      Since returning back here, we have been asked many questions by friends, neighbors and relatives who are curious about what we are doing in Missouri, our lifestyle, our plans and the like. Since many of the questions are the same, and some people are probably a little more bold than others about asking them, I realize it may be helpful to put those answers out on this blog site!

So here it goes... (feel free to post any other questions I am forgetting in the comment section!)

1. Why Missouri?

     This answer is not short, but it is probably our most asked question of all, both by local Missourians and by people who live in the other 49 states who are puzzled as to the appeal of Missouri, or frankly, where it even is on the map. I totally understand, and in fact, that was my first reaction when I first learned about a little community of people who settled in the state. But the long story is that I visited them seven years ago, and then again five years ago, and then again four years ago, and so on until it started seeming like not such a bad choice of location. The same is true for Mike, and that is where we met, three years ago, about the time we were both deciding we wanted to settle there.

     You might imagine it being an odd choice for a fairly liberal set of young people to set up community, given that around us everything is mostly rural and conservative, but take into consideration that the 30 people or so that make up our community are from 30 different far flung states, from Texas to Vermont to Oregon to Florida to Michigan to Arizona, etc... Missouri is actually kind of geographic middle ground! And our town is on a major Amtrak line, not insignificant to a group of people who prefer to travel as ecologically as possible. Another major factor is that we can all afford to live there and live the lifestyle we want to. This is probably not something most people are aware of, but land ain't cheap most places... probably five-ten times as expensive even one state away, and even more as you get closer to urban centers. So the price is right in Missouri, at around $1,600-2,000/acre, and we are all able to be homesteaders without a cloud of debt trailing us our whole lives. Not only is land affordable, but taxes are almost nonexistent! This is a factor that I will admit I never gave much thought to before becoming a tax-paying land owner, and only now am I aware that we lucked into a good situation. We (our land trust neighbors and us) pay around $100/yr. for 60 acres with three buildings on it. Just for some perspective, where my parents live in rural Wisconsin, taxes are about $1,500 per acre/yr for land with one house. That can be a huge cost for a homestead/farm of even ten acres! And the case for Missouri (from a homesteader's perspective) go on--there are some of the most diverse and abundant hardwood forests in the country and consequently, we have very inexpensive raw lumber sources via Amish-run mills. (Again, not insignificant when you are building a house!) We get really good rainfall and you are allowed to do whatever you want with the water (in some places, it is illegal to divert water into so much as a rainbarrel!) There are no building codes, so building with alternative natural materials is possible. No septic codes so composting toilets are possible. And so on. Some good reasons, right? But more than all of that, having a community of people who are all invested in living our same lifestyle--coming up with creative economic alternatives, raising children together, building houses together, creating new culture, sharing resources, fostering a real sense of interdependence etc.--is probably the biggest reason we are choosing to live in Missouri.

Wood we bought at Amish auction, two loads of like this for $60! Nice stuff too, oak, black walnut and the like...


2. Where do you live while you are building your house?

      Most blog-readers already know this, but we do get asked this regularly.  We live in a 10'x10' camping tent with a shed roof structure overhead. We have an outdoor living area and kitchen set up and honestly, we pretty much live outside all the time in a fully "unconditioned" environment. I have come to love this way of life with the exception of when it is rainy or below 45 F. It really is not nearly as uncomfortable as you think it would be to be in the heat of the summer without air conditioning. At least for me. My neighbor Beth, who is part polar bear, has a really hard time when it gets above 90 F. I, on the other hand, feel miserable in cold or rainy weather and will be glad to have a cozy house to escape to. For now, it works well to split our time going back and forth between Philadelphia in the winter and Missouri the rest of the year.


3. So you have the roof on... what about the walls?

     They go in after the frame is up (unlike in most construction) because they will be made of strawbales! Some people have heard of strawbale building and others haven't, but it is becoming more and more common. Straw is a waste product from farming grains (wheat and rice are the two main sources of straw in this country at least) and they often become animal bedding. Hay is another thing--it becomes food for livestock in the winter months and is more nutrient rich, being a mix of dry seeded grasses. Strawbales are kind of like the building blocks we have all played with as kids, they stack right up easily and quickly to form the wall itself. Wood framing can be added to support windows and doors and bales can be cut and notched and sized specially for all sorts of niches. And bonus--it doubles as your insulation material! At around R-40 (this is very good insulation-wise), it is both very economical and environmentally friendly, not to mention just plain fun and rewarding to build with. Mice and bugs you ask? Fire? None of these stand a chance in the uber-tight dense packed bales, but mold does. Mold is the kryptonite of the straw-world. If moisture gets trapped inside the bale via rain or a leak or something, it is bad news. The mold that grows is bad structurally and bad for indoor air quality. So that is why when building with strawbale people put on the roof first, with generous overhang, and then the bales follow once they are guaranteed protection from the elements. Any number of materials can be used on the outside and inside of the walls, but breathability is necessary to not trap ambient moisture inside them. Clay plaster is great for this reason, it breathes and draws out moisture and it is as cheap as, well, you know what. Haha. Seriously though, we will probably use some oak siding on the outside and clay plaster inside. And yes, you get very thick walls and deep window bays.... kind of cool if you like the look!

Strawbale house in the works at the Possibility Alliance!


4. How long do you think it will actually take you to finish the house?

     It is a bit hard to truly know... home-building projects are notorious for going over-schedule, no? But my best guess is another two 6-month seasons before being at a good point to move in. We have been warned that when you move in, you lose momentum to finish things. So maybe better to tent it a little longer...

5. Is it like a commune?

     I think communes were the 60's and 70's version of "ecovillages" and  "intentional communities" that exist today. There are hundreds, maybe thousands, of these all over the world now, and they don't have quite the same vibe of the old hippie communes, though I suppose it depends on the community. (Check out www.ic.org if you are curious what is going on near you.) But Mike and I are not even living in an intentional community. We are one of three homesteads (like a small diversified family farm) that co-own a 60 acre land trust (instead of privately owning a piece of land, we jointly form a non-profit that owns all 60 and we jointly make the big decisions about how we manage it.) That being said, in our neighborhood are several other homesteads and one actual intentional community of 12 people called Stillwaters Sanctuary, where we met. We collectively all form a community, and that is what we commonly refer to as "our community" since we share and do so much together. Still, not a commune. Not nearly that exciting.


6. How do you plan to make money?

      This, I can tell, is a burning curiosity for most people but one that only a few give voice to! Sometimes I wonder if people are secretly wondering if we are growing weed or something back in our woods, or have plans to, but we aren't and we don't. But it is a good question. I think everyone in our community has thought a lot about it, and have all have figured out different things, different enterprises to bridge the difference between total self-sufficiency (completely self-supported off the land) and total dependency on a monetary economy. Granted, it doesn't take nearly as much in Missouri, living the relatively simple lives we do, as other places. In a few years, we will be debt-free, we won't have the bills coming in (cell, gas, water, mortgage, etc.) that most people have, and we will be producing a lot of our food from the land.
     Still, I am not sure how much money per year we will need to meet the rest of our needs. It is a big unknown, and I get it that for most people money=security. The more of it in your life, the more secure you are. There is truth to that, but for me, owning and having a relationship with a piece of land also feels like security, having a tight-knit community helping each other out feels like security, and having a decent skill-set feels like security. Still, all of those things can't buy toilet paper, right? So... money. We currently make money with our construction business and we could continue our business in Missouri (build small local eco-houses?). We have thought of building a studio-arts space for classes, exhibits and space for me to work on my art, though I suppose being an artist is not exactly the definition of financial security. We have thought of opening an etsy shop online to sell furniture, crafts, arts and such, which is what our neighbors Brian and Teri just did, check out Brian's beautiful work at-- www.etsy.com/shop/AcornHillHandcrafts. We have thought of selling produce and value-added food products at our local farmers market in Missouri. And so on. I think we will figure out the right combination of all of the above to make ends meet and be happy doing it.


7. How will you get water?

     A few people have asked about this, and the answer is pretty simple. We are planning to set up a system where we can catch water running off of our roof and store it in a cistern from which we can then run plumbing into our house for normal use. There is still a learning curve ahead of us as to how to best do that, above-ground cistern that we can gravity feed to the house, or below ground cistern that we would then need some sort of pump for? What material for the cistern and how to manage the plumbing so it won't freeze in winter? I'm sure there will be lots of research and a future blog-post on the topic once we get to that point. As for our gardens, our pond is conveniently hooked up to a spigot that we can gravity feed downhill to most locations we would want to water. We haven't tested it on a larger scale garden but this past summer it worked pretty well on a smaller patch.


8. Will you have electricity/solar/wind power? How will you heat your house?

    These are good questions, and ones we haven't totally decided on yet. We are okay with being without electricity in our house and just using candles/solar lights and non-electric versions of most things (we have both adjusted to that lifestyle living at the Possibility Alliance and other places that operate without electricity, it is easier that you might think). But we have also thought of a few electric tools and appliances that we keep thinking would be nice to have--a chest freezer, a battery-recharger, a small water pump, a cordless drill, and so on. It seems something like solar panels or a small wind turbine are probably in our future for operating those things, and the deep-cycle batteries that go along with them since we are down the road a ways from the closest grid connection.
     As for heating, we are hoping that a big cast-iron wood-burning cook stove will suffice for heating our whole house. Lately, I have been researching different models and getting excited for the day that we'll be able to sit by our own stove. My dream model is called the "Flame View," (check it out- www.antiquestoves.com/margin%20stoves/flameview/) where you can actually see the fire through a side-loading door. With one stove, we will be able to heat 2,000 sq.ft. of space (not that we have that much), heat 20 gallons of water via rear-mounted tanks and a heating coil, bake in the oven portion, cook food on the cook surface, dry clothes on racks overhead, and so on, all from wood from our land! Though it is a pricey initial investment, it seems a very essential element of off-the-grid homesteading.

9. Will you have internet/phone?

     Yes to the phone. Before we left, our Amish neighbor Jake was explaining the best plan for us to get in a rather funny conversation... "it's called Verizon Home-Phone, and it doesn't involve any wires running into your house! They just put a box in there to increase the connection if you are having trouble getting the signal." The funny thing is that though he is probably one of the least tech-savvy people we know, he is totally in the same boat as us in terms of restrictions on what we can get. Amish aren't allowed to have any grid tie-ins, but they are allowed to have phone booths across the road on the corner of the neighboring field with a cellular connection in order to run businesses. To extend phone lines down to our land would be difficult and expensive, so we may just look into this Home-Phone business once we have a Home. Internet we are not sure about, but for now it works to check email and such when we are in town at libraries or coffee shops.


10. Why do you want to live that way?

     This is not a frequently asked question, but I suspect that it is the most-unasked question in people's minds!  Sometimes people do ask it though, and then I am left with a moment of hemming and hawing while I try to extrapolate a reasonable-sounding concise explanation without sounding crazy, judgemental or like I am a "prepper", which I am not. Amish Jake actually asked us that question once, "So have you always wanted to live like this? I mean, you weren't raised this way, were you?" Which makes me laugh, since he is the last person you would think would have questions about our chosen lifestyle!
     The truest answer is that we find it deeply satisfying to live simply, in relationship with the land and a beloved community, creatively meeting our needs with little impact to others and the earth we live on. Maybe instead of "little" impact, I mean "with full awareness and connection to" the impact we are having in this world. It is hard these days to feel meaningfully connected to the full impact chain of anything in our lives--from the hands that made the clothes you wear, or where the water goes after it leaves your sink, to what tree from where went into the chair you are sitting in as you read this! But we are all aware in the back (or front) of our minds that there are horrible atrocities being committed the globe over to mountains, waters, ecosystems, native peoples, people in developing nations, other species, on and on. We all know we are creating one hell of a toxic mess on the only planet we have, and it isn't right, but no one is individually to blame... right? It is totally overwhelming to be a caring, aware person, and much easier to remain unaware and keep going about your business, because really, don't we all have enough on our minds and hearts as it is? In the end, it just has felt right for us to choose a different lifestyle entirely, a more simplified and localized one, albeit one that is perhaps a bit anachronistic to our technology-trending, globalizing world. And not that we are "perfect" and non-complicit in all of the mess-making, (because we are still driving a car and using some electricity and buying imported things occasionally,) but we are at least trying a big experiment in living differently. And if it works and we're also having more fun while fulfilling all our human needs and wants, who wouldn't want to live this way?
     

Sunday, December 15, 2013

Raising the roof


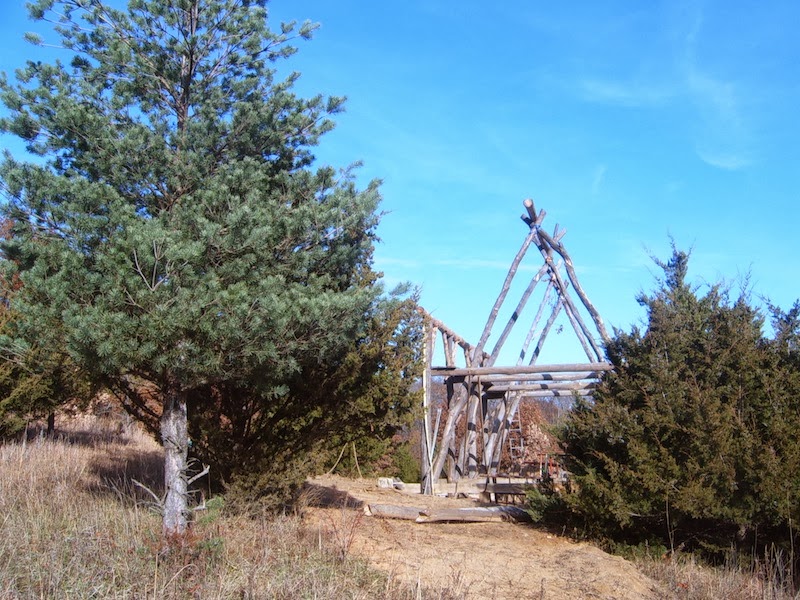
     A week before Thanksgiving our house looked like the above images, framed out roof with bottom fascia attached, about... oh.... one month behind schedule. Daytime temperatures were between 15-35 degrees the week leading up to this point, Mike had left to begin work in NYC, and I was beginning to feel a bit hopeless and worn down from weeks of pushing hard to get it even to this point. Enter: my super family. I suspect that my parents and sister possess the same "fool-hardy determination" DNA that I have that seems to lend itself to giant DIY home projects, because we all gravitate to them in a big way. And my sister's handy boyfriend Danny? This is the second major Jack-Scott family home-renovation project that he has been coerced into, so I suspect by now he knows full well what he is getting himself into with my sister, or rather her family. But if he thinks she is worth clambering around on a steeply pitched roof in below-freezing weather until he can no longer feel his extremities, then we think he is worth her... and she is pretty awesome.


     So in short, for a week, my parents, sister Emily and Danny all helped me get our roof ready for the final layer of metal to go on. First we had to lay down our 2" rigid foam board, tape the seams, and staple tar paper over top. After that was down, we screwed in oak furring strips parallel to all the rafters. These provide an air gap between the metal and rigid foam board so that air entering the bottom eaves (there will be some grill-type material so mice/birds do not get in... hopefully) can move up to the ridge cap, which allows the air to pass back out, keeping the whole roof assembly cool in winter. If it gets too warm from hot air in the house rising and leaking out, then you get roof snow melting into ice, and forcing itself under the roof, into walls, and generally reeking havoc. Hence, the extra step. On top of the oak furring strips, we ran 2x4s perpendicular, every 2 ft. up to the ridge. As they went on, we could use them as a ladder, working our way up to the top. Their actual purpose is to fasten the metal roofing onto, and level out any minor inconsistencies in the levelness of the rafters below.


     As the days went by, the weather started warming up, so that by Thanksgiving day, we could be outside comfortably (thirty-forty degrees?) We took the day off to cook and spend time with our neighbors at the Possibility Alliance, where we experienced a true Thanksgiving potluck feast. Turkey, duck, chicken, venison, mincemeat pie, a dozen vegetable, mushroom and grain dishes, homemade bread, butter, cheeses, preserves, pickled things, deviled eggs, on and on... ALL raised/grown/gathered from the land! Even the "cranberry sauce" was substituted by a very tasty wild autumn olive sauce. Our community tradition is to spend a few hours walking the land, giving thanks for all of the abundance we receive from it, and with such a feast to be had, it is not a stretch to feel in touch with such gratitude. After the walk, we had all cleared appropriate room for the many pies, cookies, whipped cream (from Leila the cow) to follow. Candlelight from handmade beeswax candles lit the whole affair, and as the night went on, stories, singing, instruments came out and more friends stopped in to visit. I love Thanksgiving in general, and this year felt even more special somehow. I suppose it's because both Mike and I have a lot to be thankful for, between Mike's recovery from a serious accident and the fact that we have received SO much support from our families and community in our home building efforts. What a year!


      And the support was not to end yet! A few days later, our roof was fully ready for the metal to go on. We finished on the last night by flood light (run by generator) in the dark. My parents and Danny had to return the next day, leaving my sister and I to the metal roofing, which had arrived just in time. Mike and I had decided on a standing-seam metal roof, because it would be easy to install (haha), relatively affordable, and we could collect drinking water in a cistern from it, and oh, it is pretty darn long-lasting. We reasoned that we want our roof to be functional as long as possible before being replaced, and while asphalt shingles are much cheaper and easier, they last only 15-20 years before hitting the landfill. On the other hand, a slate single roof that lasts multiple centuries was a bit out of our price range, hence the second best option: standing seam. My grandparent's old farm house has a standing seam metal roof that has been around for their entire lifetimes and still going strong with only periodic need for repainting. Ours came with a forty year guarantee on the baked-on paint finish, with hopefully many more years after that once repainted. As for the color? We actually had an instantaneous agreement for once in the entire building process... burgundy. Settled. I ordered the metal and it came, and then I started worrying... what if we got down to the last piece and we were short still? What if I didn't order enough? Or the lengths I ordered were too short? Plagued with such anxieties, I was not sleeping very well at the time. It felt like the next few days were going to make or break something. Probably our bank accounts since it would be an expensive mistake if I mismeasured. And only one way to find out for sure.

   
        Okay, never fear, everything works out for the best, usually, and our roof was no exception. Turns out our wonderful Amish neighbor Jake called in two of his talented young sons (of a fleet of six, all exceptionally good at building and such) to help with the project... he foresaw that we would need backup. Smart man. We did. Joe and Amos took to the roof like mountain goats--while Danny and I had been moving slowly and cautiously around up there, maintaining three points of contact at all times, not to mention wearing safety harnesses, Joe and Amos would run up and down the purlins, dangle half off the ridge ends, or straddle the ridge as you see in the above photo. As one of them told me, "well, in the spring, when I've been off a roof for the winter, I am a little slower up there, but then I get used to it after a few weeks and its nothing." Yeah... that's how I am in the spring too.


      Anyhow, we all made a good team. Emily and I were mostly on the ground custom cutting each weird notchy triangular piece for the dormer, while the boys ran around up top. Jake slowly chipped away at the massive inconvenience of the dormer and all its trimming. (See that small little triangular protrusion on the one side? It single-handedly turned this from a one day to a two long day project. Think twice before popping one of those suckers in your building plans!) But it came together. The weather was cooperating beautifully, with balmy temps in the fifties and no rain. As we were closing in on the finish the second day, the most amazing sunset lit the low hanging clouds ablaze in pinks and oranges, which was good, because we needed as much light to finish as possible. It ended an hour later, in darkness, with the lightest/youngest guy wearing a headlight being lowered by rope down the side of the last panel, screwing in the last little piece. Thank God. Hallelujah. The next day, temperatures plunged thirty degrees in almost an hour and stayed low, we got our first snow flurry a day or two later. In those next few days, Emily and I did the most insane close-up-camp sprint you can imagine (with help from saints in our community who braved the freezing cold to come out and help us) and then we were on the road headed east. A week sitting in hot tubs at Myrtle Beach in the company of our wonderful aunt and uncle thawed out all of our frozen bits and aching muscles. I guess it doesn't take much to bounce back to new. Still, I am glad I don't have to face our house again for another season. May it still be there, standing, when we come back!


Sunday, December 1, 2013

Roof framing

Mike pegging in the ridge poll ahead of the first rafters going up

        For the last few weeks we have been working almost every workable hour of every day, rain or shine. Make that the last month. This definitely constitutes "the final push". For that reason, I am sorry to be a few weeks behind on my posts, and I am rewinding somewhat to get caught up to the present moment!

      Framing out the roof has been a challenge to say the least. It has been the union of square, dimensional roof planes and factory milled boards to our curvy, irregular round-wood timber frame. Imagine if you will what would happen if an uptight, orderly banker-type had an arranged marriage to a free-spirited, woodsy folk artist-type. The union would not go smoothly, without a modicum of frustration and struggle, and neither has our roof framing. 

Julia notching wall plates so that rafter birdsmouths will have a seat to rest on

      Mostly, we have had to figure out how to define level and square within our long, curvy wall plate timbers. Typically, in a conventionally framed house, you are working with straight and level 2x6 or 2x4 wall plates that run the perimeter of the walls. The rafters each get a little notch called the "birdsmouth" that keeps it from wanting to slide off the top of the wall plates, and the birdsmouth is notched at exactly the same place on each rafter, screwed or nailed into the wall plate and a perfectly level and consistently pitched roof is achieved. Wah-la. But not so with our  wall plates. Fifty-some individual notches in our timbers at varying depths later, I can say with some certainty that ease of roof framing is not one of the advantages of round-wood timber framing. Perhaps we should have stuck with roundwood rafters and embraced a curvaceous roof line. But since we are putting on a metal roof, we needed something really, really straight. 

Mark and Mike installing the first rafters

     Thankfully, we have had some really great hired help for a few weeks in the form of our friend Mark and his brother Kent, both very skilled builders of a more conventional type. Mike worked the ridge poll, I notched the wall plates, trying to keep ahead of the rafters as they processed down the length of the building, one by one. Kent manned the cutting the station on the ground and Mark up along the wall plate. And somehow, it mostly has worked, with a minimum of undulation along the roof line (nothing a few shims couldn’t take care of anyhow). We got the last of the rafters in just as Mike had to depart early for his early migration east. Thanks to his Dad Sam, who came out to help us for a few days, we also got the last of our pegs in, thus officially completing the timber frame portion of our building. It looks beautiful, for all of the occasional frustration it has caused us. I think I would still choose to build this way, if I had it all to do over again, but, well, let’s hope that’s not anytime soon. 


      At this point, Mark and Kent and I have framed out a finicky little gable dormer in the center of the south roof side, we have our sub-facia and facia boards attached to trimmed rafter tails, and we are preparing for our final week of roof work. I am wearing down stamina-wise and budget-wise at this point, and each day gets a little harder to get through as the temperature drops and working conditions are less than ideal. Far less. What I wouldn’t give for another month of September. But thankfully, my wonderful family is coming in to reinforce me and help me get through the last hurdle—the roof purlins and metal. As my sister Emily said to me on the phone the other day, “don’t worry Jules, the cavalry is coming…. ” An alternative Thanksgiving gathering is in the works, and for that I am most thankful!


Mike pegging braces and jowls into wall plates

Mike's dad Sam came to help us for a few days, here planing down pegs

      So I am preparing all the ingredients here—rigid foam boards (expensive!) oak nailing strips, purlins, tar paper, plenty of fasteners, and oh, the roof metal. The single most expensive purchase of my lifetime so far and I had to pay in cash to a local Amish distributor, thanks to my checkbook run prematurely dry. Imagine the funny interaction between his sweet, polite wife laden with small babes and I, as I nervously passed her a very fat envelope to give to her husband, out hunting or something. Me: “Uh… could you make sure he gets this? It is important.” Her: “Oh yes… (as she checks it)… oh my! Yes, that’ll be fine.” The Amish are a rather understated, even-tempered bunch who rarely demonstrate emotion in word or facial expression so it can be a bit hard to read them sometimes. Still, I think that was Amish for surprise. 


      One final note—thanks to our neighbor Beth, we have been tiny house-sitting for the last few weeks, and thus, staying quite warm and cozy on these freezing nights. Two years ago she was doing her own mad-house-building-marathon as I recall, so it is nice to be reminded that it really does end at some point, with a beautiful and cozy place to call home as a result. Home, sweet home... here we come!

Wednesday, November 20, 2013

Raising Day part II


      It's a rainy day, it's a rainy day.... finally, a day to get caught up on blogging! I apologize for the long hiatus, we have been very, very busy working toward our roof goal on our house. And we have gotten a lot done! So much that this is going to be one long blog post. So let me back up. Here is about where we left off, with our jowl posts raised and frame pegged, with weeks of prep to do for our wall plate raising. Note the weather... we experienced many rainy, yucky days where our options were not getting much done or getting wet doing it. But we had many sunny days too, and so we proceeded slowly, bit by bit. My mantra lately has been a Creole saying, "piti, piti, le wazou fe nicheli" (translation: little by little the bird builds it's nest).  How true. If I allow myself to consider the whole of the work ahead of us, the project seems totally overwhelming and hopeless. So I break it down mentally into small goals, and then smaller steps to reach those goals. And the goal of this next phase was "wall plates".

     The first step toward the "wall plate" goal was notching the tops of our jowl posts into tenons. We used a string to lay out straight lines and square up our frame. (What a simple but invaluable tool a length of string is! I have lately been appreciating its virtues in building.) Then we chiseled out our tops to a consistent height. (We used a transit level to determine level from a nearby hill.) So here I am, adjusting to the height of our new working level. As you can see, a length of rope gave me more confidence working out on the ends of our scaffolding.


     We also had to cut mortoises for diagonal bracing coming off each jowl post. Again, more drilling, and cleaning out the holes with chisels and mallets. On rainy days we would work on cutting the corresponding tenons on our braces under the cover of our outdoor kitchen roof. Eleven braces and eight jowl posts later, we were... well, closer to ready. We began to start mentally preparing and scheduling our next raising day, when we would lift 36 ft. long logs horizontally in the air and set them down on the post and brace tops. This seemed even more daunting than our first raising day, and thus our thoughts ran toward hiring the help of some heavy lifting machinery. How much this would cost us, we didn't know, but a chance encounter with a friend of our neighbor Don Miller at a Halloween party brought the answer. Tom lives not so far away and was in the possession of a large tractor with a lifting arm and when he heard our situation, he generously agreed to help. We set a day, far enough off that we thought we'd have enough time to finish all that needed to be finished and then we continued work with new-found urgency. Braces had to go in and get temporarily braced in position, and our wall plates needed ten mortoises each. It was a stressful week of working every day lit hour, until we couldn't see anymore in the evenings, and sharing company with the early morning frost at the start of each day. But more than the stress of trying to meet our set raising day, was the stress of not really knowing if it would work to hoist the wall plates in the air and gently set them down onto ten little pieces of wood sticking up. A lot could go wrong....


      Around this time, I began resenting framing in round-wood. How much easier it would be to have a square-milled timber to prepare for such a raising! No irregular measurements and notching requirements. Our 36 ft. oak wall plate timbers were anything but straight, with a long taper and slight to not-so-slight bends along the whole length. We had to figure out the best side to position down to give us the straightest line across the top, and then we had to notch out a shoulder around each mortoise to make each brace and jowl hit at the same height. Again, ode to string! We strung a line on both sides and leveled each shoulder cut to those lines. And then drilled and chiseled. We were running out of time, and friends were generously helping to feed us so we could focus all of our time on getting things ready for our Saturday raising day. Saturday morning rolled around, a beautiful warm day, and our friends Brian and Dan, and then Mike and I were all chiseling out the last of the mortoises when Tom showed up. Like a storybook cliche, with not a minute to spare we were just barely finished in time to raise! But, would it work? Or would our hopes and dreams be dashed? (In case you can't tell, I am trying to recapture the suspense we felt that morning!)


      But, never fear! Yes! It worked! Tom centered the boom arm of the tractor on the log so that the weight was equal on either side and then chained it on. Then we started on the south side, the tall side, and Tom was just barely able to reach up high enough to get the log over top. Three of us were up on scaffolding, ready to do... something. We were deviating somewhat from what our guide book advised, and we weren't sure how it would go, or what we would actually do to get the wall plate to fit down on. Here was this heavy log dangling mid-air above ten little tenons. We figured out quickly that the heavy side wanted to drop on first and slowly, Tom was able to lower the log down so that it dropped inch by inch across, working from one side to the other. We prodded and poked tenons into position until we had the last one on. What a feat of measuring! We had gotten every mortiose cut just right to line up with each tenon! Even though this was our intention, even I was impressed that it had actually worked. And to say Tom was a wizard with this huge awkward machine would be an understatement. We were clearly sent the right help for the task: he was able to nimbly adjust height and depth positioning to the quarter-inch and dance around little trees we had planted below. It was like a tractor ballet. Encore! Literally. We had to do it a second time. 

   
      We entered our second log with much new-found confidence, and good thing, because we were off on some measurements this time. Two of our mortoises were cut an inch off, the result of haste and stress, and day-before debate about where to start measuring. I had drawn out several sets of measurements the night before and we had forgotten and drilled the wrong ones the next morning. Ugh.  What to do when your  800 lb. mistake is dangling in the air in front of you? Tom had the idea to move the post and brace over an inch. Strange that our seemingly solid frame is still so adjustable, but it was. We unbraced it and moved it with a single ratchet strap! And then repeat side one, drop down and sledge hammer into position. At this point, it occurred to me to grab a camera and start snapping the last five minutes so that we had a record of our hair-raising day. So here it is!


     It took a little adjusting later to get the wall plate to sit down just right on each tenon, but we got it in place and were able to take a little break for the rest of the weekend. So much to go, but so much behind us also! Our roundwood timberframe portion of the building triathalon (or is it a decathalon?) was finished (well, almost, only a little more pegging to go). Surely the roof framing would be but a moment's work in comparison.... Surely. Ha ha. Okay, I think the roof saga merits it's own post. Soon. It has stopped raining and I have some more framing to attend to! 

From the south
From the south-east

From the west, road-view